Edit a Campaign Document
Once documents have been added to a campaign, they can be edited. Documents can be edited from the campaign documents child form and the Add - Campaign Document pop-up window.
There are two methods to edit a campaign document from the campaign documents child form. These are using the Edit icon or the GoTo icon next to the document to be edited on the campaign documents child form.
Editing a Campaign Document from the Child Form
To edit a campaign document from the campaign documents child form using the Edit icon, complete the following steps:
- Go to the Campaign Profile.
- Click the Documents tab on the Campaign Profile.
- Expand the campaign documents child form to view the list of current documents uploaded to the campaign.
- Click the Edit icon next to the document you wish to edit. The Edit - Campaign Document pop-up window appears.

- Expand the document drop-down menu and choose a new document to upload in the old document's place.
- Click the Edit icon to make changes to the document you selected in the document drop-down menu.
- Click the Add icon to add a document if the document you wish to add is not available in the document drop-down menu.

- Click the Save button.
Using the GoTo Icon to Edit a Campaign Document
To edit a campaign document from the campaign documents child form using the GoTo icon, complete the following steps:
- Go to the Campaign Profile.
- Click the Documents tab on the Campaign Profile.
- Expand the campaign documents child form to view the list of current documents uploaded to the campaign.
- Click the GoTo icon next to the document you wish to edit. The Edit - Document page appears.
![]()
Edit the following fields as needed:
| Field | Required? | Description |
|---|---|---|
| document code | Yes | Enter the identifying code for the document. |
| summary | No | Enter a short summary of the document. |
| description | Yes | Enter a more complete description of the document as it relates to the campaign. |
| url | No | Enter the URL of the document if it is hosted on a server. |
| file name | No | Enter the path-name to the document in this field. If this document will be searched by eWeb enter the name of the file. To enable searching on eWeb the document must be stored under the eweb\docs folder. |
| author | No | Enter the name of the document author. |
| document source | No | Enter the origination source for this document. |
| send via email? | No | Click this check box if this document can be sent via email. |
| allow search? | No | Click this check box if this document can be searched on eWeb. |
| send via fax? | No | Click this check box if this document can be sent via fax. |
| document text | No | Enter keywords that will be used to locate this document using eWeb search. |
| send via regular mail? | No | Click this check box if this document can be sent via regular mail. |
| send always? | No | Click this check box if this document should be sent. |
| send web link? | No | Click this check box if only the web link for the document should be sent and not the actual document. |
Click the Save button.
Editing an Uploaded Document from the Add - Campaign Document Pop-Up Window
Document information can be edited by clicking the Edit icon located next to the Add - Campaign Document pop-up window.
![]()
The Edit - File Upload pop-up window appears.
You can add all of the fields outlined above when adding a document, including the file being uploaded.
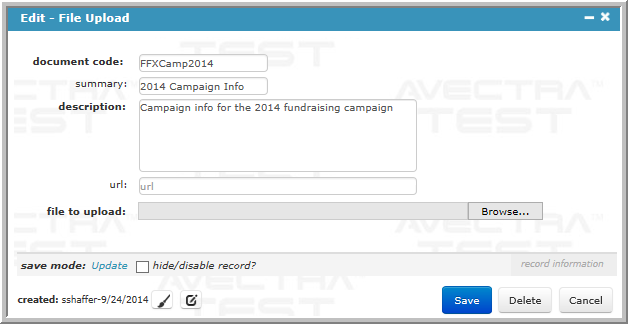
Click the Save button to save your edits.