Add and Edit Price Attributes
OR
OR
OR
The NetForum price attributes enable you to make a price of a product available for only certain types of customers. Clicking the Add icon opens the Add-Price Attributes page, which allows you to define the various attributes that must be met to be eligible for the related price.
This topic covers using the Add - Price Attributes page.
Adding Price Attributes
To add price attributes, use the following steps:
1. Follow the path listed above.
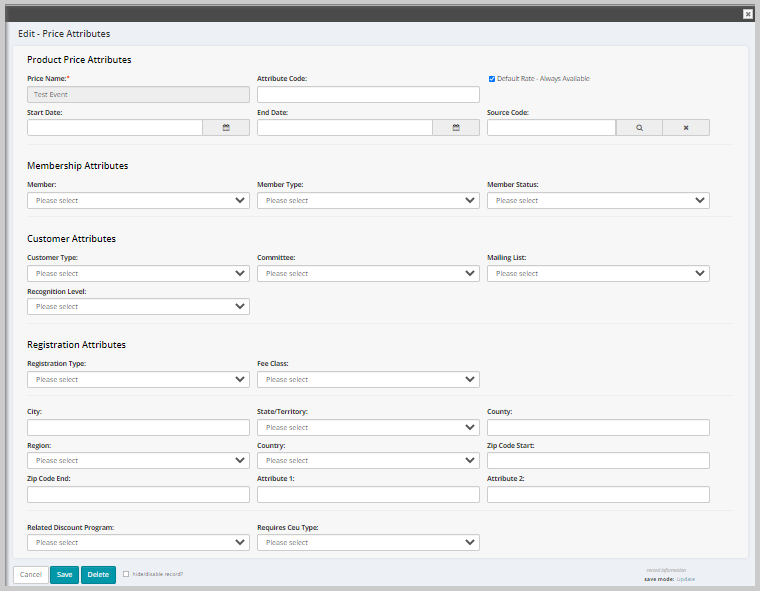
2. Click the Add icon. The Add-Price Attributes page opens.
3. Fill in the fields in the Product Price Attribute section as described in the table below:

| Field Name | Required | Description |
|---|---|---|
| Price Name | Required | This field defaults to the name of the parent fee or price. |
| Attribute Code | Optional | This field defaults to the code of the parent fee or price. |
| Default Rate - Always Available | Optional | Check this box if you want this price to be the default price. |
| Start Date | Optional | Enter or select the date that this price becomes valid. Date ranges are normally set up for special promotions or prices. |
| End Date | Optional | Enter or select the date that this price becomes invalid. Date ranges are normally set up for special promotions or prices. |
| Source Code | Optional | Assign a source code to track marketing materials to see how well they drove people in for the sale. |
4. Fill in the fields in the Membership Attributes section as described in the table below:

| Field Name | Required | Description |
|---|---|---|
| Member | Optional | Select Member or Non-Member to restrict the price to only customers who receive member benefits or only those customers who do not receive member benefits. |
| Member Type | Optional | If you want to restrict this price to a certain member type, select that member type from the drop-down list. |
| Member Status | Optional | If you want to restrict this price to a certain member status, select that member status from the drop-down list. Only the statuses available for the Member Type selected above are available. |
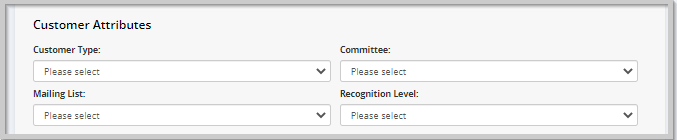
5. Fill in the fields in the Customer Attributes section as described in the table below. Depending on your choices below you will see some, but not all of the fields in the table below:
| Field Name | Required | Description |
|---|---|---|
| Customer Type | Optional | Select Individual, Organization or Chapter/Affiliate. |
| Committee | Optional | Select a committee that will receive this special price. |
| Mailing List | Optional | Select a mailing list that will receive this special price. |
| Recognition Level | Optional | Select a recognition level at which customer will receive the special price. |
6. Fill in the fields in the Registration Attributes section (The Registration Attributes section is only available for Event Registration Fees.) as described in the table below:

| Field Name | Required | Description |
|---|---|---|
| Registration Type | Optional | Select registration type from the drop-down list. |
| Fee Class | Optional | Select a fee class from the drop-down list. Fee class should only be selected if you have entered cut off dates for pre reg, early, standard, and late registration on the Event profile. If you select one of these values, then the start and end dates on the price attribute will be determined by the corresponding dates on the Event profile. Example: Prices with a Fee Class of pre reg are available from the current date until the pre reg cut-off date. |
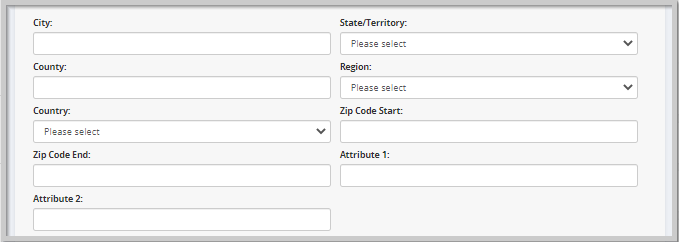
7. If you want to restrict the pricing by region, fill in the fields in the Location Attributes section as described in the table below:
| Field Name | Required | Description |
|---|---|---|
| City | Optional | Enter the city that will receive the special price. |
| State/Territory | Optional | Select the state or territory that will receive the special price. |
| County | Optional | Enter the county that will receive the special price. |
| Region | Optional | Select the region that will receive the special price. |
| Country | Optional | Select the country that will receive the special price. |
| Zip Code Start | Optional | Enter a single zip code or the start of a range. |
| Zip Code End | Optional | Enter a single zip code or the end of a range. |
| Attribute 1 | Optional | Price Attribute 1 in Customer Demographics |
| Attribute 2 | Optional | Price Attribute 2 in Customer Demographics |
8. Fill in the fields in the Additional Attributes section as described in the table below:

| Field Name | Required | Description |
|---|---|---|
| Related Discount Program | Optional | Select a discount program from the drop-down list. |
| Requires Ceu Type | Optional | Select a CEU type for which this price is valid. |
9. Click the Save button to add a Price Attribute to the child form and return to the Profile.
10. Click the Cancel button to return to the Profile without saving the Price Attribute.
Editing Price Attributes
To edit the price attributes:
1. Click the Edit icon next on the price attribute record. The Edit - Price Attributes form displays.
2. Edit the appropriate details in the relevant fields.
3. Click the Save button to update a Price Attribute. Click the Cancel button to return to the Profile without saving the Price Attribute. Click the Delete button to delete the Price Attribute record.